Video editing effects are changes or filters you can add to your video to make it look better or more interesting. Some effects are simple, like a “hard cut,” which is just switching from one scene to another. Others are more advanced, changing how the video looks or even adding things to it automatically.
These video effects are great for today’s content creators, who can record high-quality videos quickly and easily. But they’re also helpful for professional video makers, allowing them to create cool videos much faster than before. There are many tools, like Wondershare Filmora, that let you add these effects to your videos.
In this article, we’ll talk about the different types of Filmora video effects and show you how to add and remove them.
Part 1: Types of Video Effects in Filmora
Before diving into the main section, we must know about the few types of video effects in Wondershare Filmora.
Using Mosaic Blur Effects
The mosaic blur effect lets you blur a specific part of your video or even the entire video.
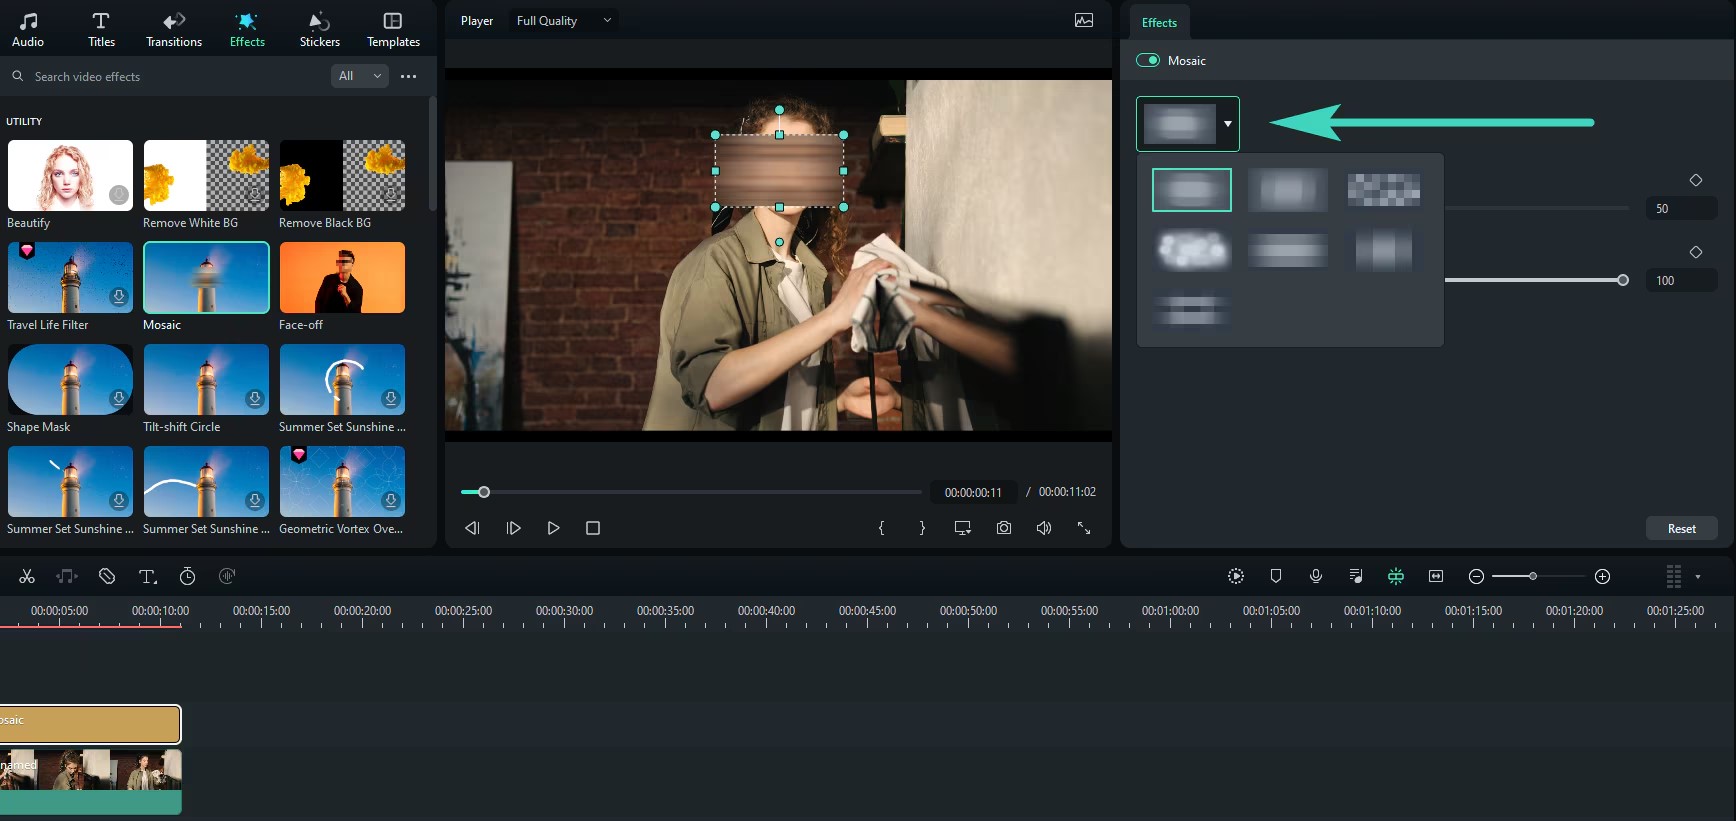
Step 1: Adding Mosaic Effect to Blur Objects in the Video First, click on the Effects tab at the top. Then, find Video Effects and click on Trending. Look for the Mosaic effect and drag it to the track above your video in the timeline. You can move it to where you want it to start in the video and adjust how long it lasts.
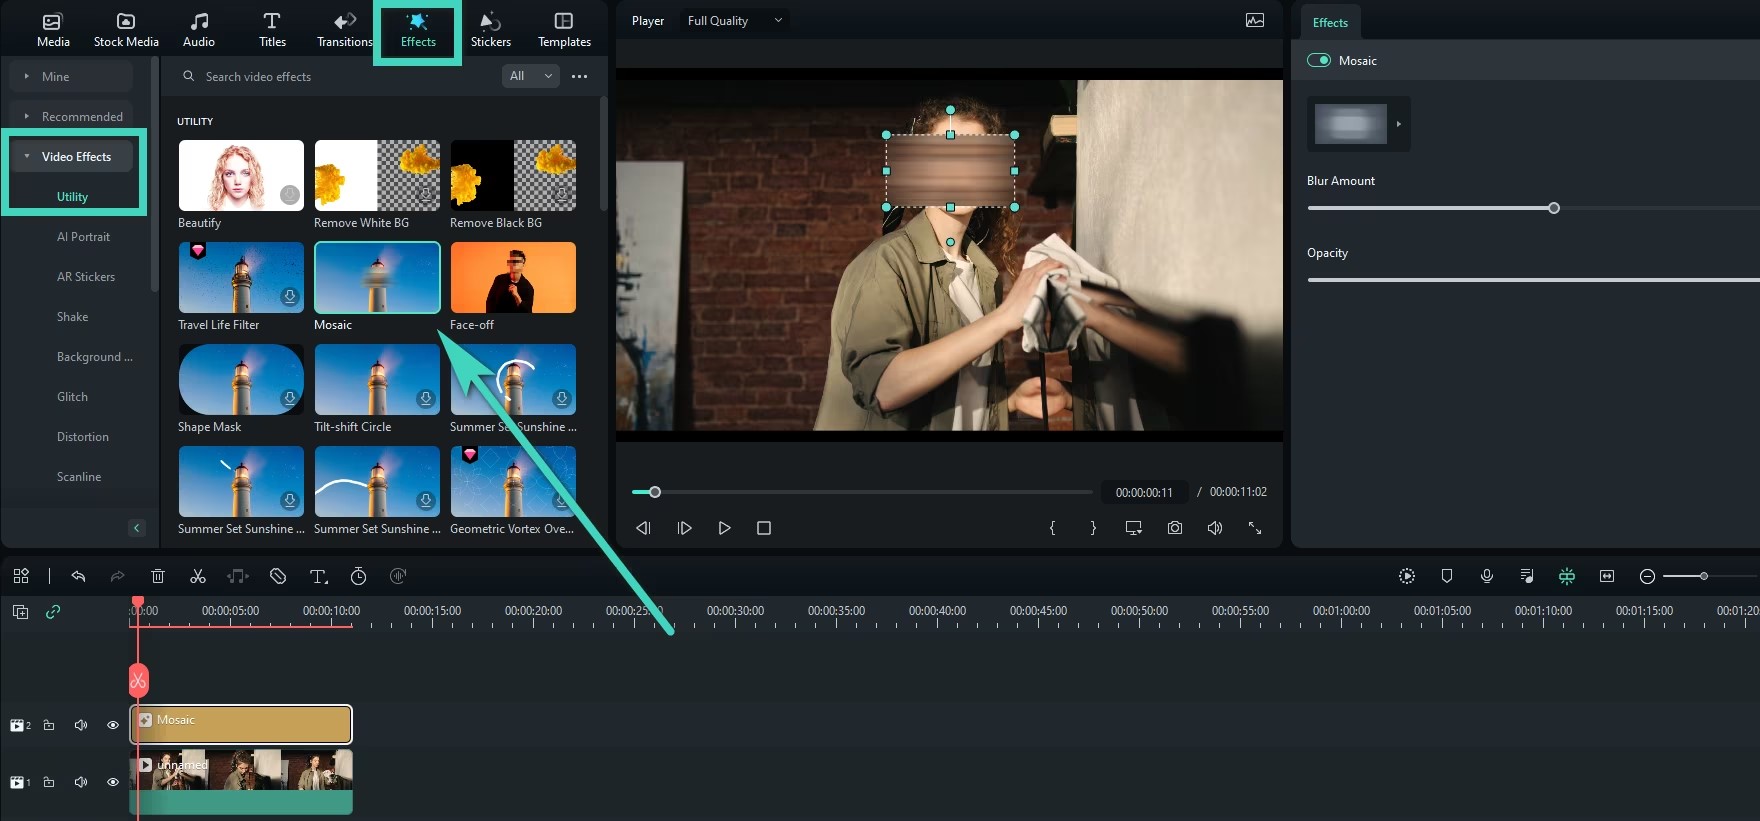
The mosaic blur effect lets you blur a specific part of your video or even the entire video.
Step 1: Adding Mosaic Effect to Blur Objects in the Video First, click on the Effects tab at the top. Then, find Video Effects and click on Trending. Look for the Mosaic effect and drag it to the track above your video in the timeline. You can move it to where you want it to start in the video and adjust how long it lasts.
Step 3: Adding Mosaic Effect to the Whole Video Go back to the Effects tab and scroll down to the Video Effects section. In the search box, type “Mosaic.” You’ll see several related effects pop up. You can choose the Pixelate Store or Pixelate 2 effect.
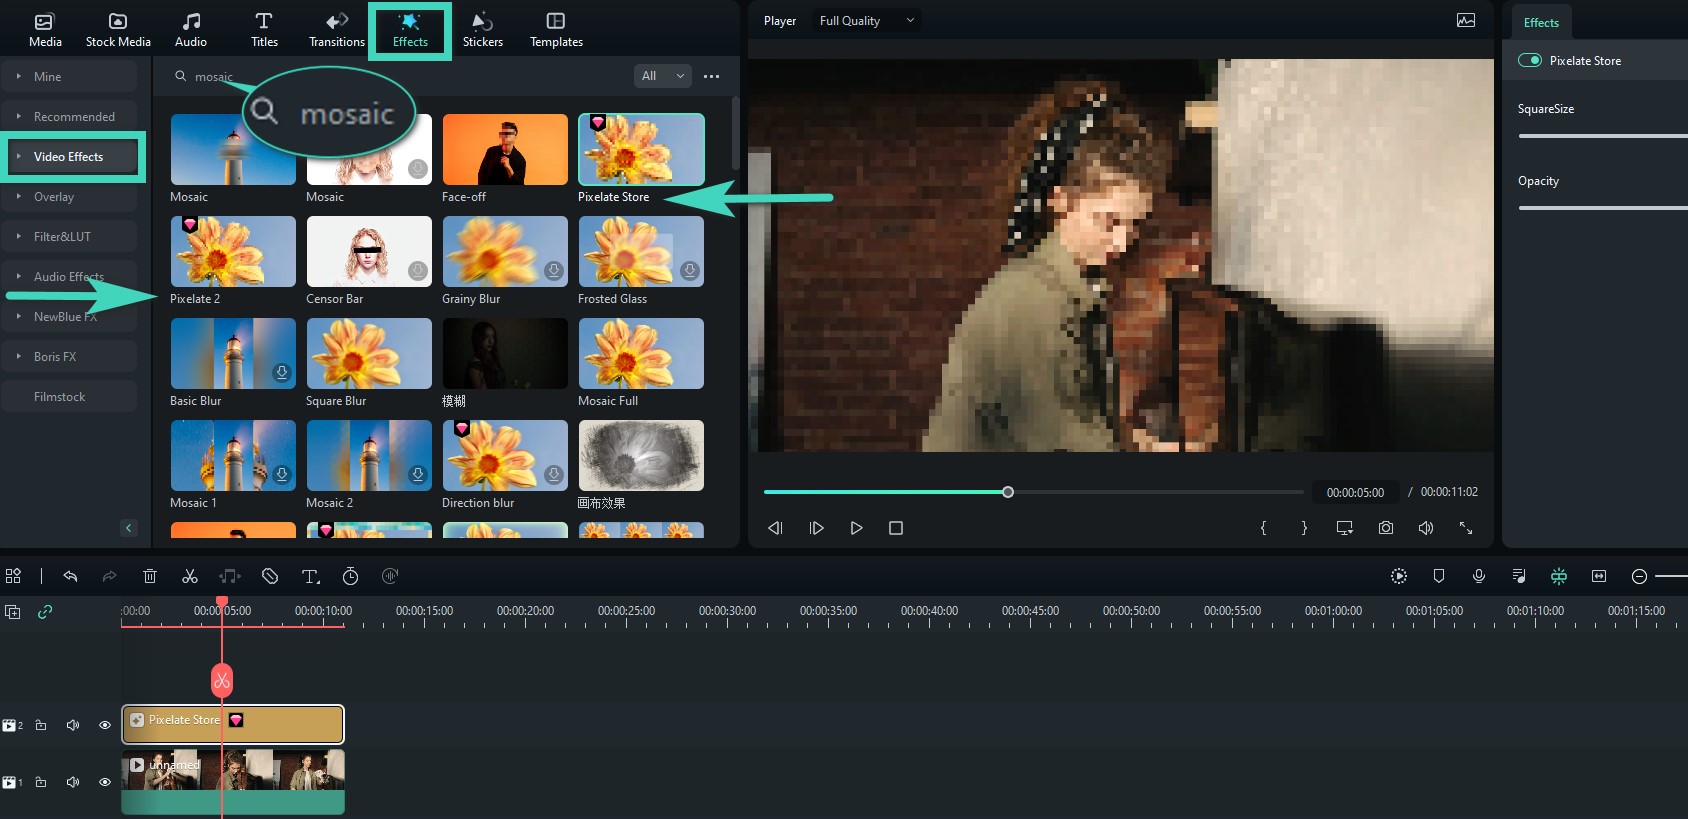
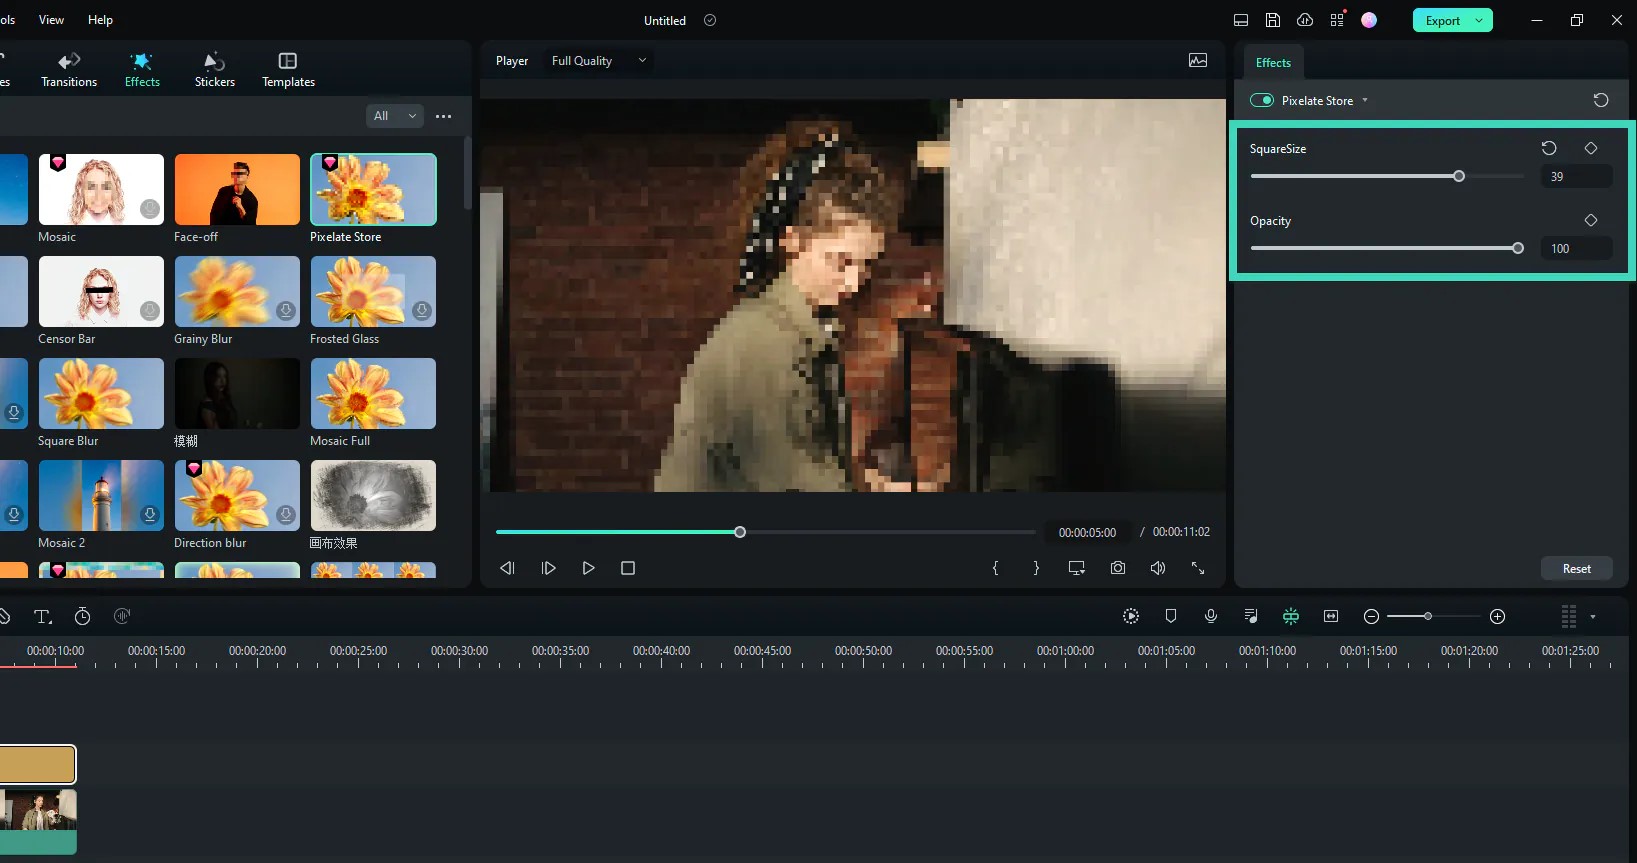
Step 4: Adjust the Pixelate Mosaic Effect. Drag one of the pixelate effects to the track above your video in the timeline. Then, click on the pixelate effect in the timeline to adjust its Square Size and Opacity to get the look you want.
Using Face-Off Effects
The difference between the Mosaic effect and the Face-off effect:
The Mosaic effect lets you blur any part of the video, and that blurred area stays still while the video plays.
The Face-off effect is different because it covers moving faces, so even if the person moves, the face stays covered.
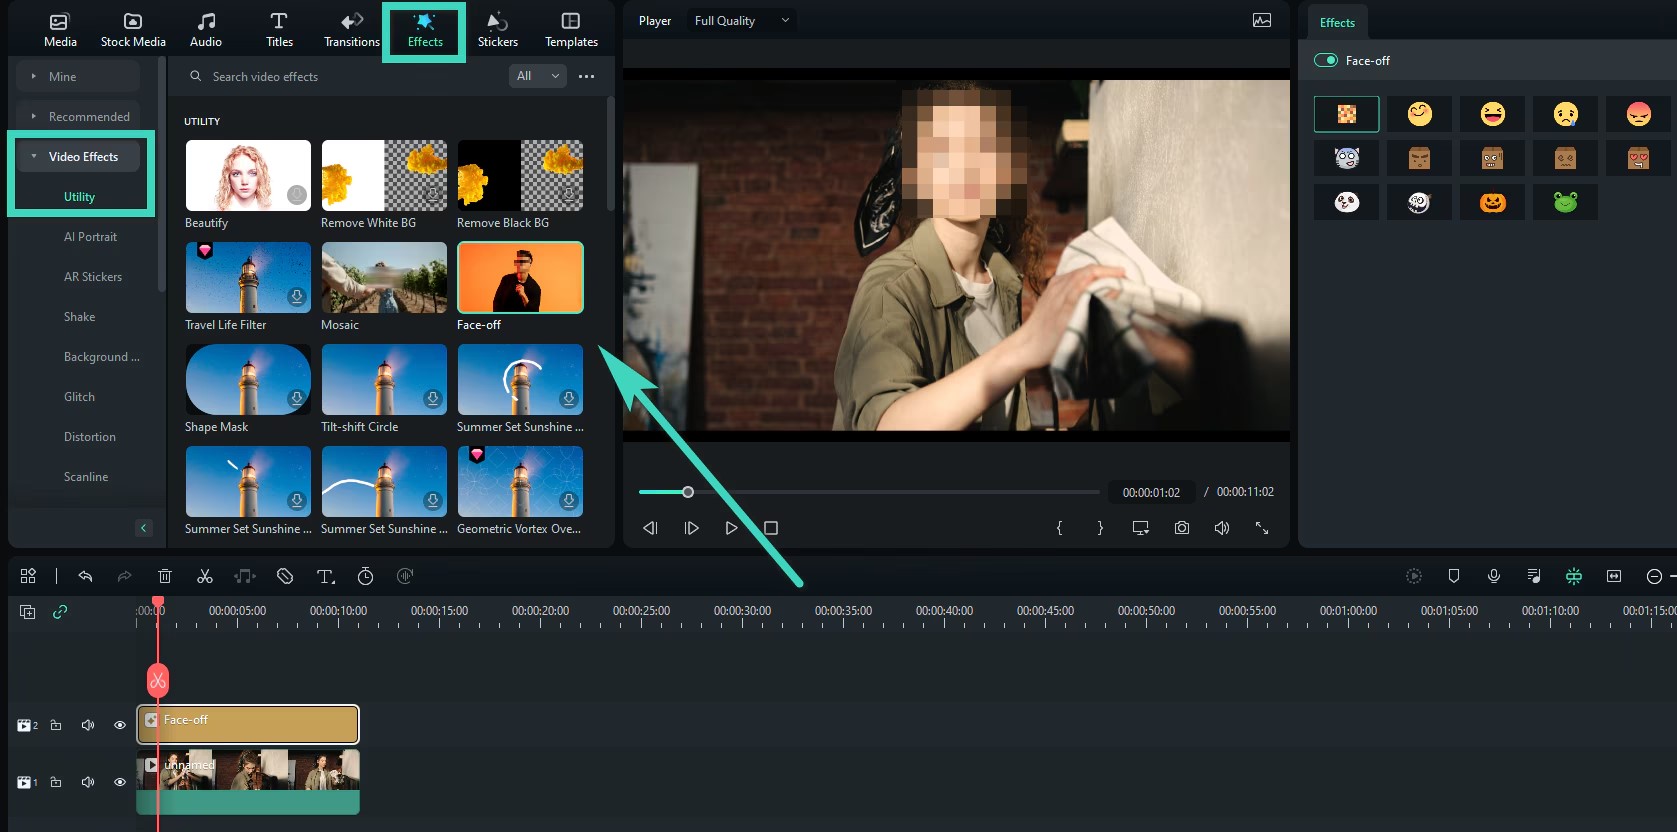
Step 1: Adding Face-Off Effect to Video First, click on the Effects tab at the top. Then, scroll down to the Video Effects section.
Step 2: Apply the Face-Off Effect. Find the Face-Off effect and drag it to the track above your video. When you do this, the face in the video will automatically be blurred with a mosaic effect.
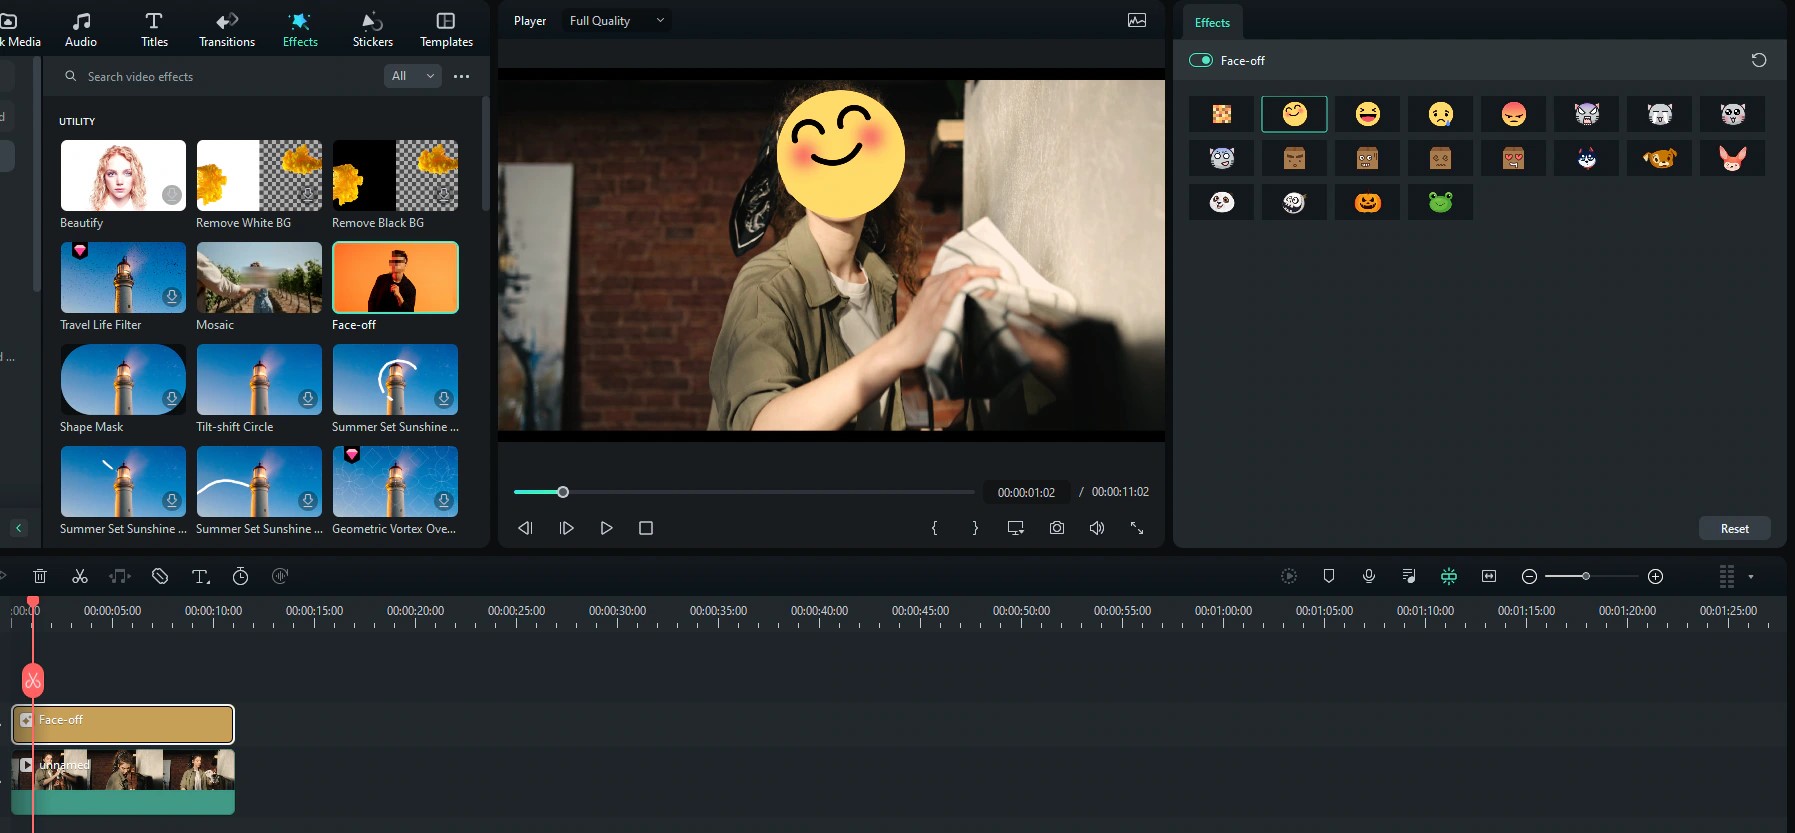
Step 3: Change Face-Off Preset Double-click on the face-off effect in the timeline to open the Effects editing panel. You’ll see lots of fun face presets from which you can choose. Pick the one you like and click OK to save your changes.
Using Mask Effects
Filmora’s masking feature is a powerful tool that lets you hide part of an object in your video so you can edit the rest. You can use it to add different effects, transitions, and more to just one part of your video. But sometimes, getting the mask just right might take a little extra time.
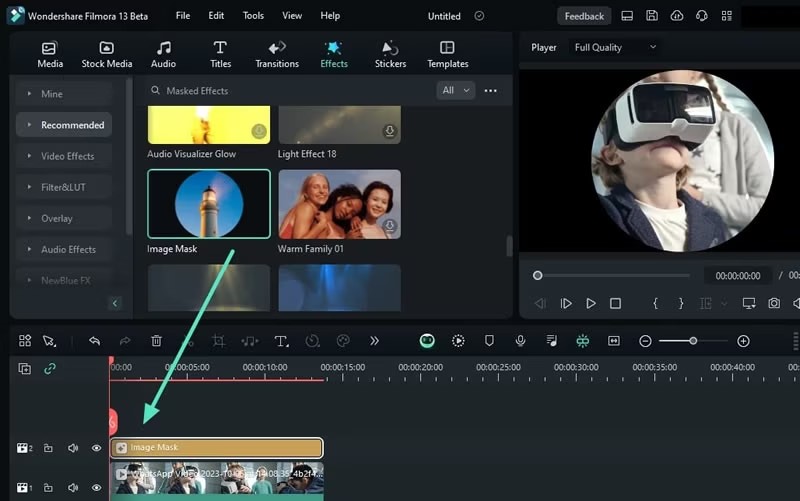
Step 1: Find the Mask Effects
First, click on the video clip in the timeline. Then, go to the Effects tab and type “Effects Mask” in the search bar.

Step 2: Apply the Mask Effect
When you find the mask you want, drag it and drop it onto the timeline track above your video clip. Then, click the Play button in the preview window to see how it looks.
Part 2: How to Apply Video Effects in Filmora
In Wondershare Filmora, you can add visual and audio effects to your videos to make them look and sound cool. You can use these effects as many times as you want on different parts of your video. There are a few ways to do this, but the easiest way is to drag an effect from the Effects library and drop it onto the video clip you want to change.
Another way is to pick the Filmora video effect or audio clip you want to add an effect to, then go to the Effects menu in the Controls Panel. There, you can see all the effects FilmoraPro has and choose the one you like.
Here’s how you can add effects:
Drag and Drop: Find the effect you like in the Effects library. Drag it and drop it onto a clip on the timeline.
Apply to Multiple Clips: If you want to add the same effect to more than one clip, hold the Ctrl (Windows) or Command (Mac) key and click on the clips you want. Then, drag the effect over one of the selected clips, and the effect will be added to all of them.
Use the Controls Panel: Click on the clip in the timeline. Go to the Controls Panel, click on the Effects option, and choose the effect you want to add.
You can also add effects to audio clips the same way by dragging and dropping the effect onto the audio track. Once the effect is added, you can change its settings by going to the Controls Panel, clicking on the Effects option, and then adjusting the effect as you like.
Part 3: How to Remove Video Effects in Filmora
If you don’t like how an effect looks or sounds, then you can easily remove it in Filmora.
Removing Selected Effects from a Clip:
Click on the clip in the timeline.
Go to the Controls Panel and click on the Effects option.
You’ll see all the effects you’ve added to the clip. Select the ones you want to remove. To remove several effects at once, hold the Ctrl (Windows) or Command (Mac) key and click on each effect you want to delete.
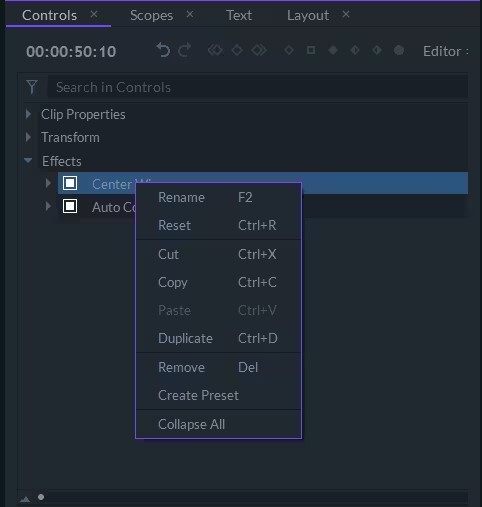
Press the Delete button, or right-click on the selected effects and choose Remove from the menu.
Removing All Effects from a Clip: Right-click on the clip in the timeline and select the Remove Effects option. This will remove all the effects from the clip and reset everything to the original settings.

Conclusion
Filmora Video effects are essential for enhancing the quality and creativity of your videos. Understanding how to apply and manage these effects can help you create more engaging and professional-looking content. Don’t hesitate to experiment with different effects to discover new ways to make your videos stand out.