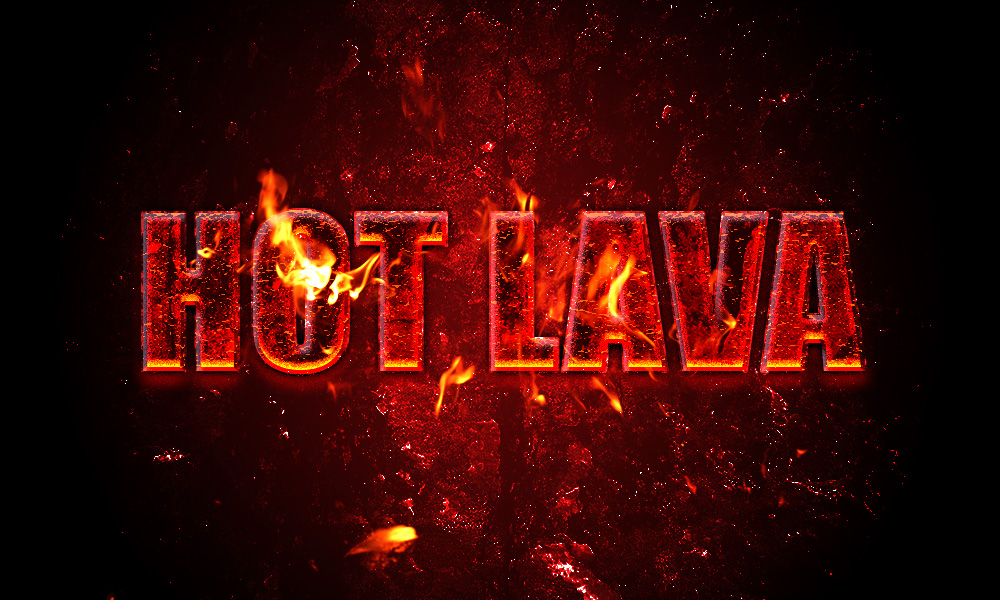
In this tutorial, you’ll be learning how to create a hot lava text effect in Photoshop. I have put a step by step process in the making with screenshots to help you understand the whole process easily.
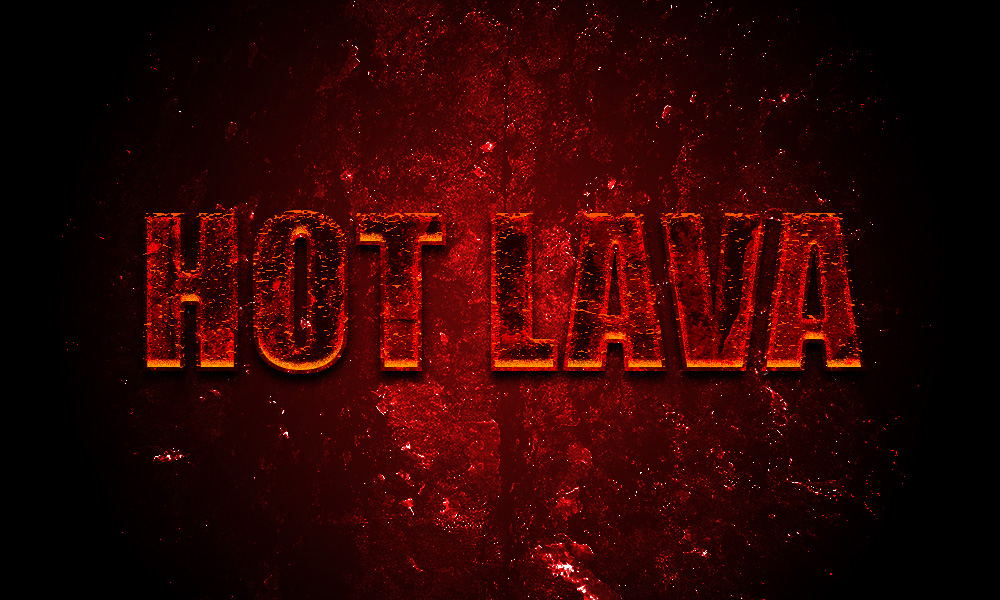
This is the final result of the text effect you’ll be learning in this tutorial.

Assets required:
Free Font: Impact (fontsquirrel.com)
Lava Texture: included in the download file
Fire Flames (from Morguefile.com)
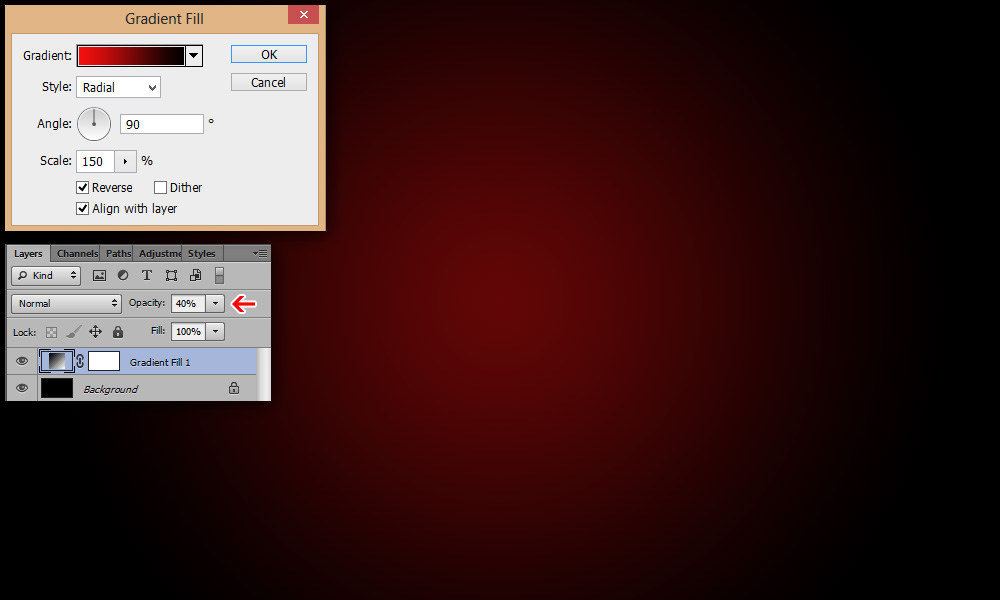
Okay, let’s begin with creating a background layer of 1000 x 600 pixels with black color. Now add a Gradient Fill Layer with black and red colors. Set the gradient style to Radial and Scale it to 150. Now reduce the layer opacity to 40% as show below.
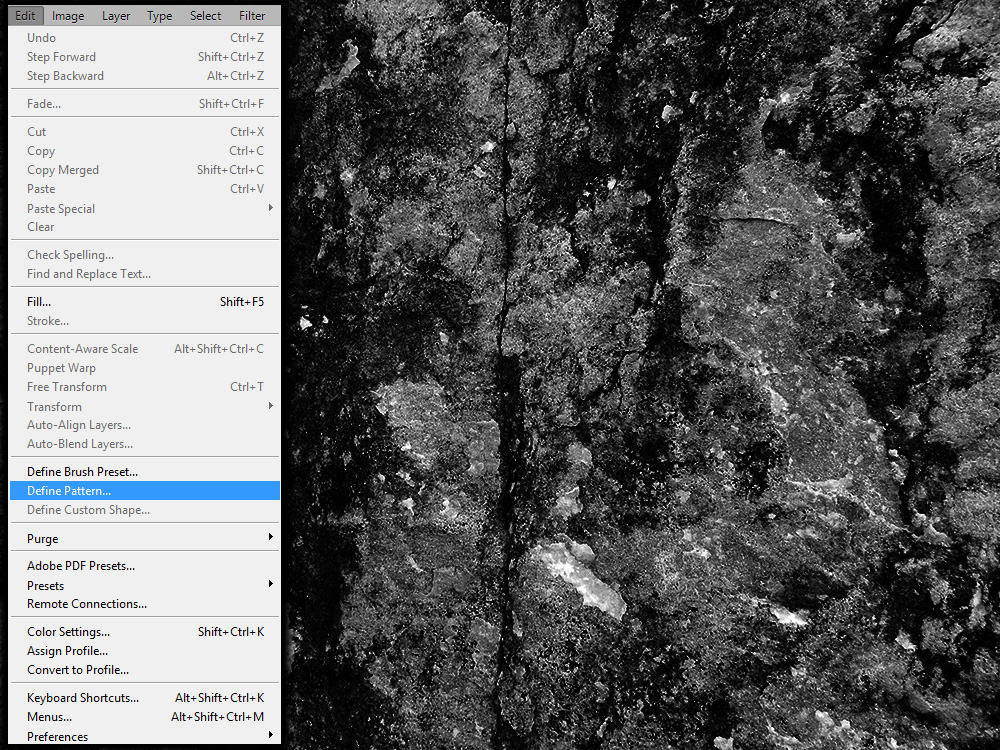
Next, open up the texture file in Photoshop and set it as a pattern by going to Edit > Define Pattern.
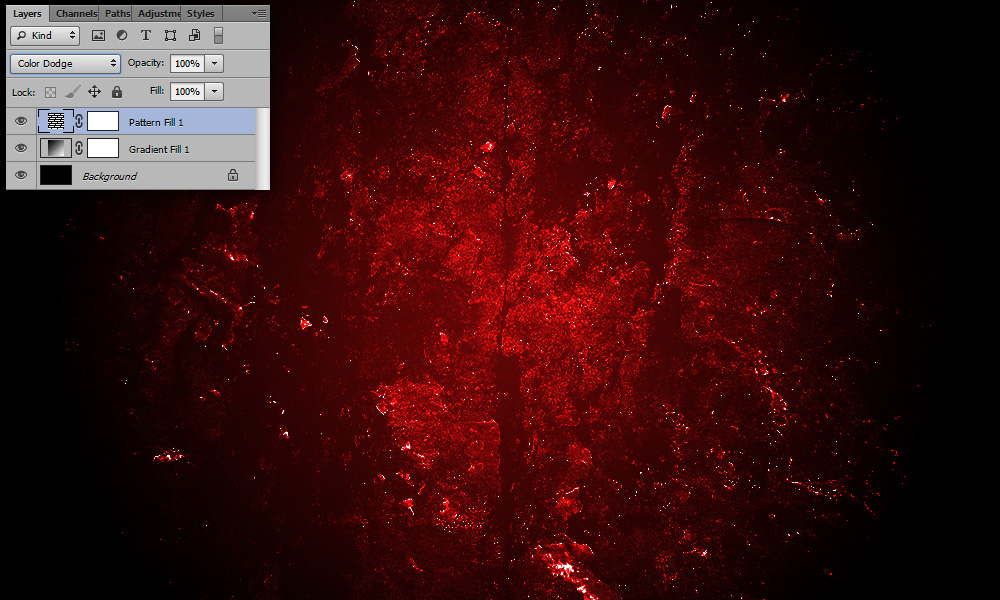
Create a Pattern Fill Layer and select the Lava texture pattern from the pattern popup window library. Set the Pattern Fill Layer blending mode to Color Dodge.
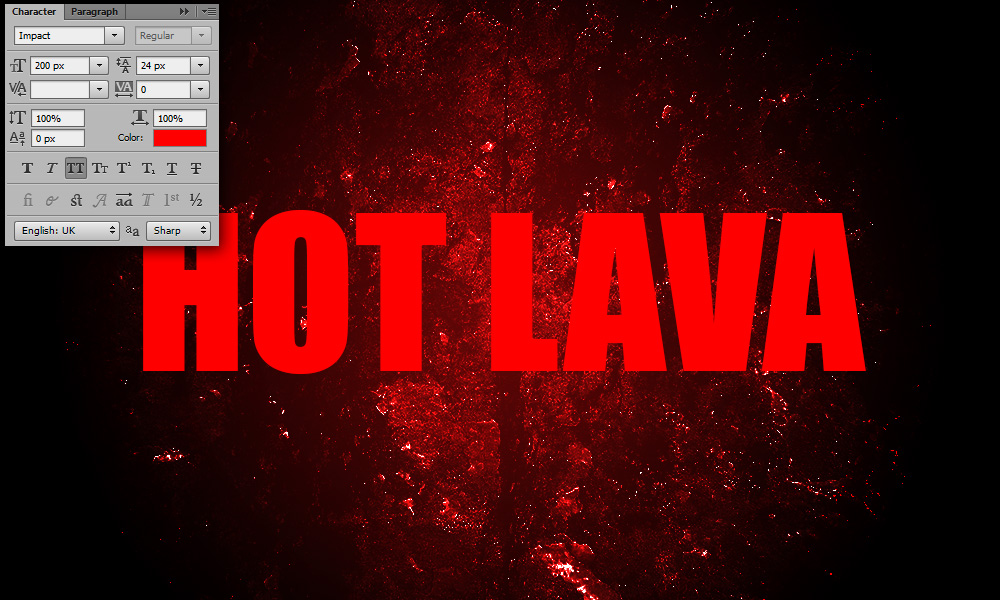
Add “HOT LAVA” text in caps in “Impact” font. Set the font size to 200px and text color to red.
Apply the following layer styles to the text.
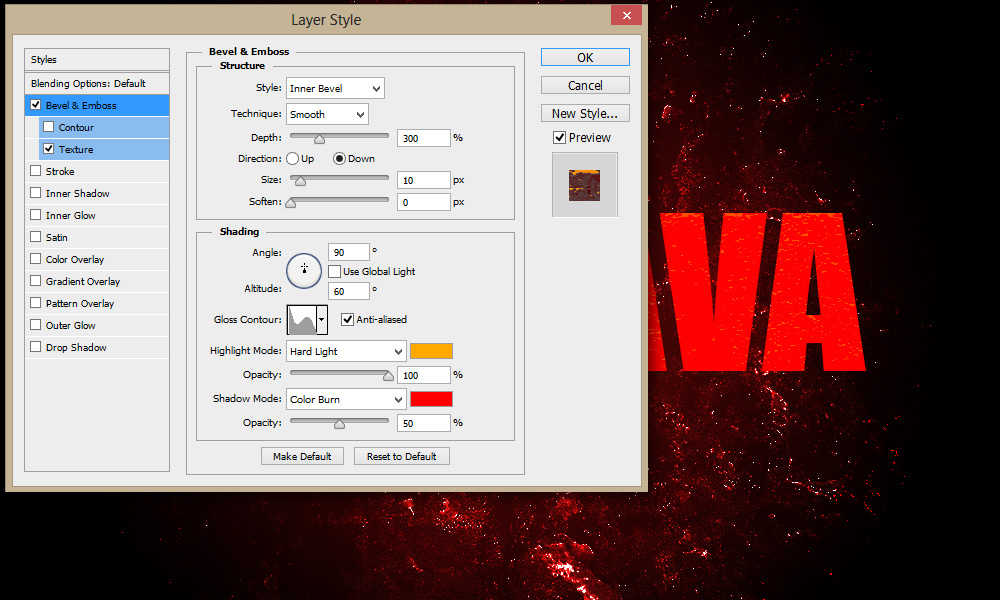
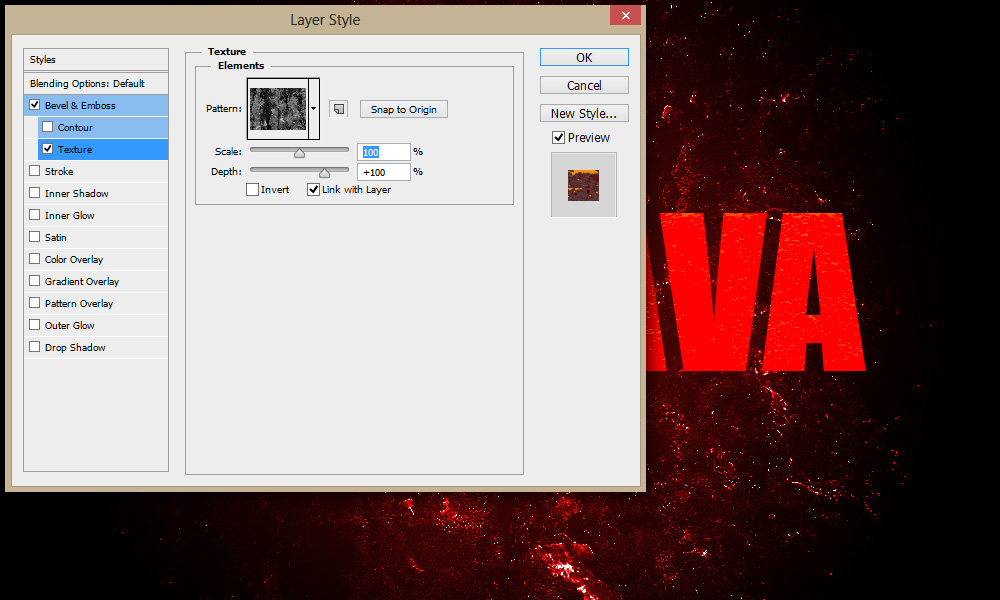
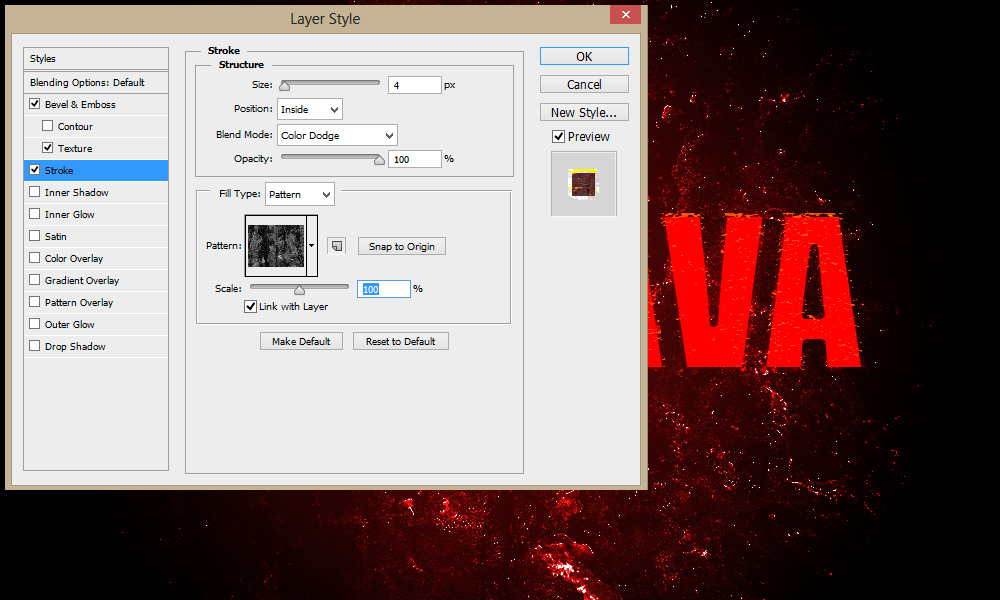
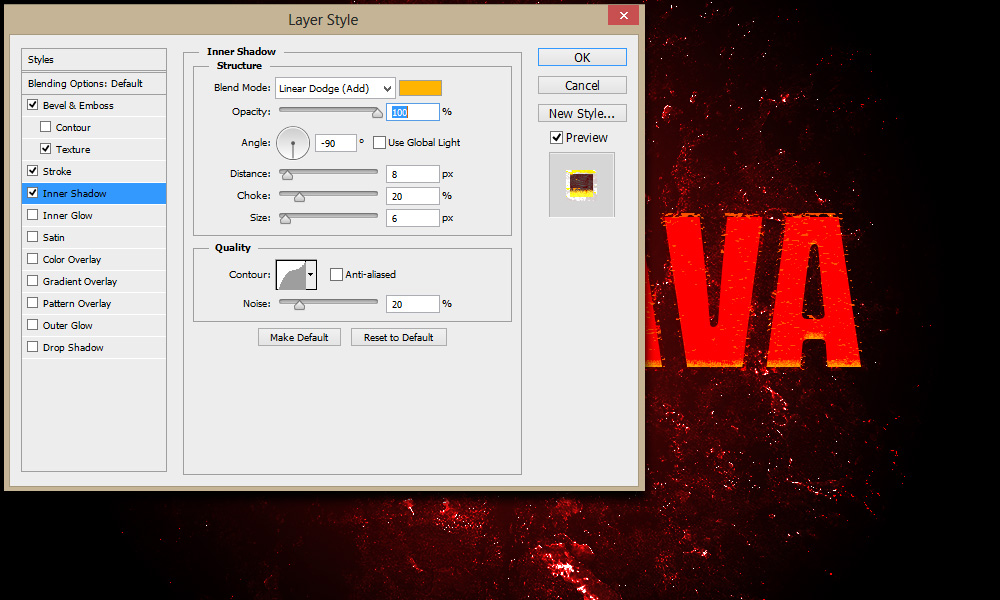
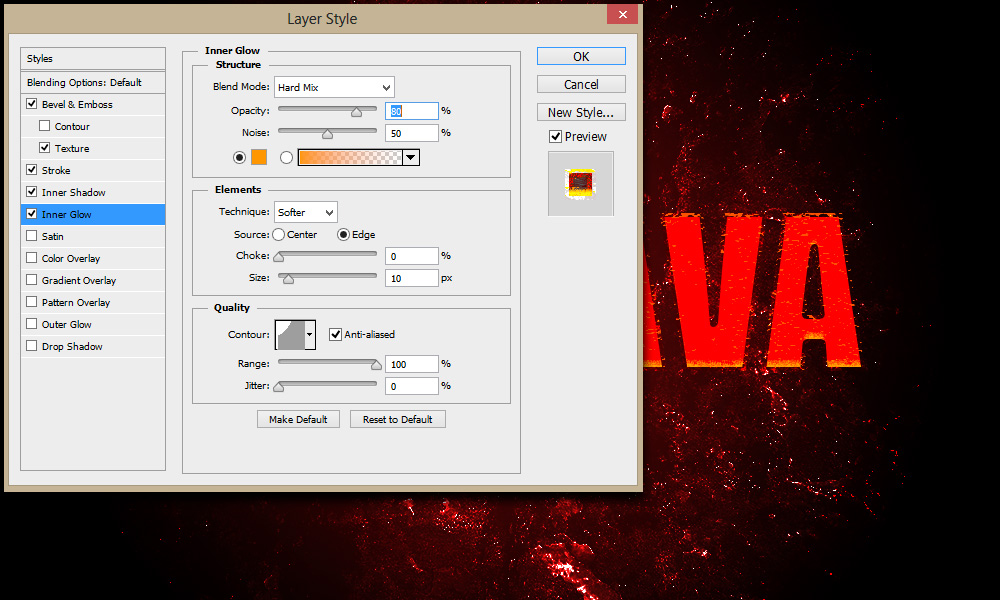
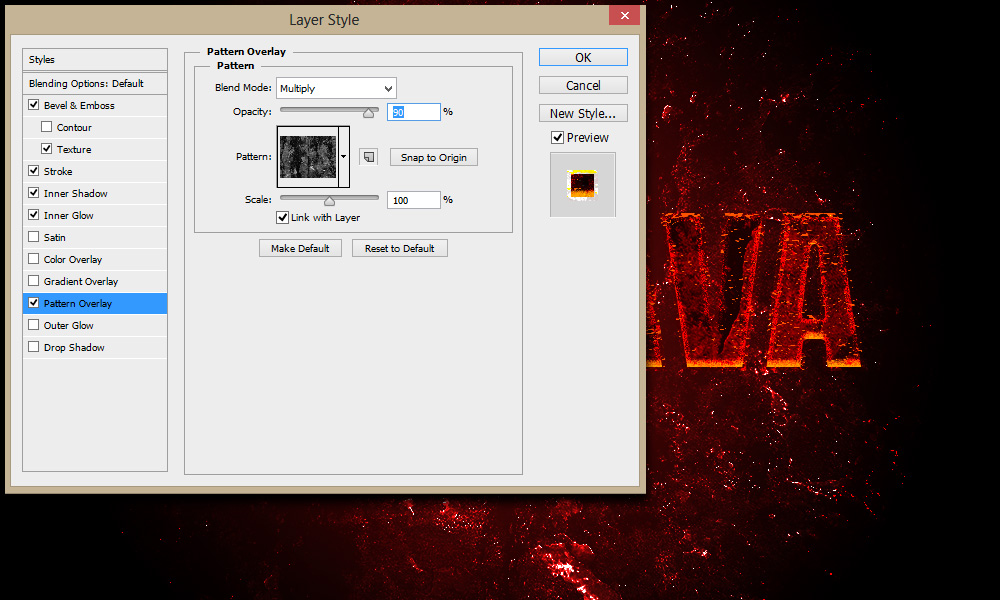
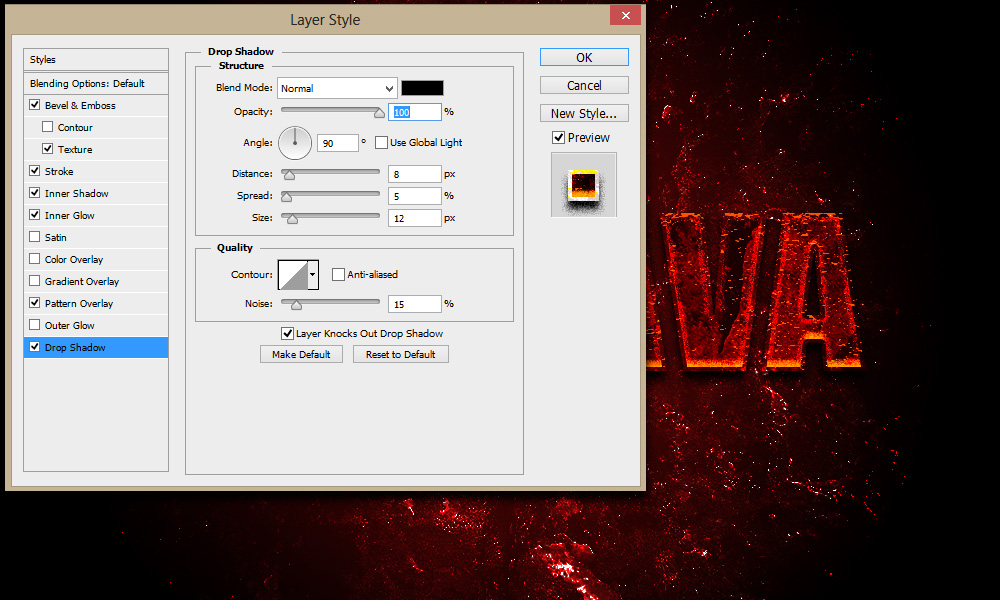
Now your text will look something like this.
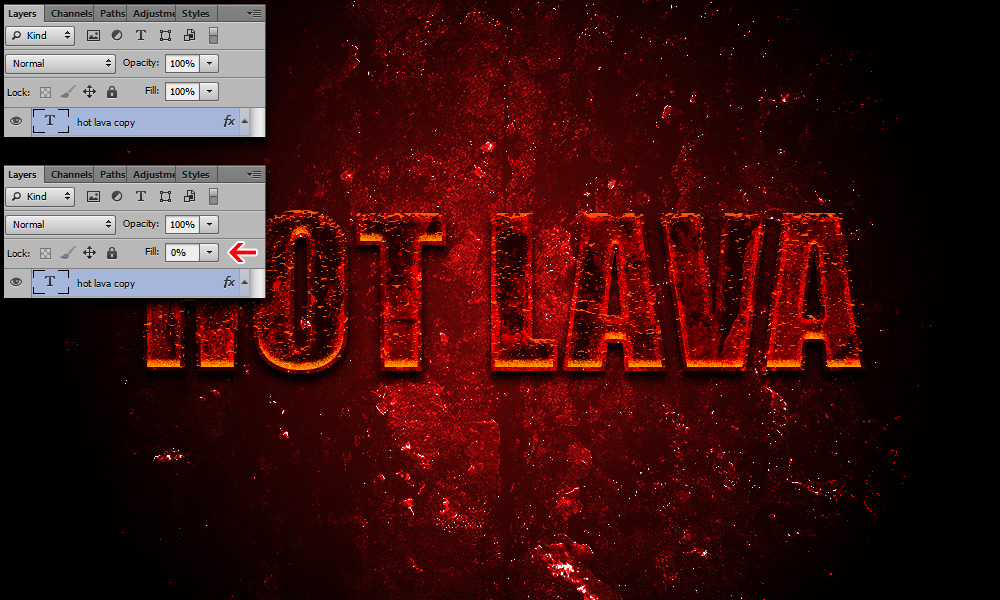
Duplicate the text layer (Ctrl/Cmd + J) and fill the Interior Opacity of the layer to 0%.
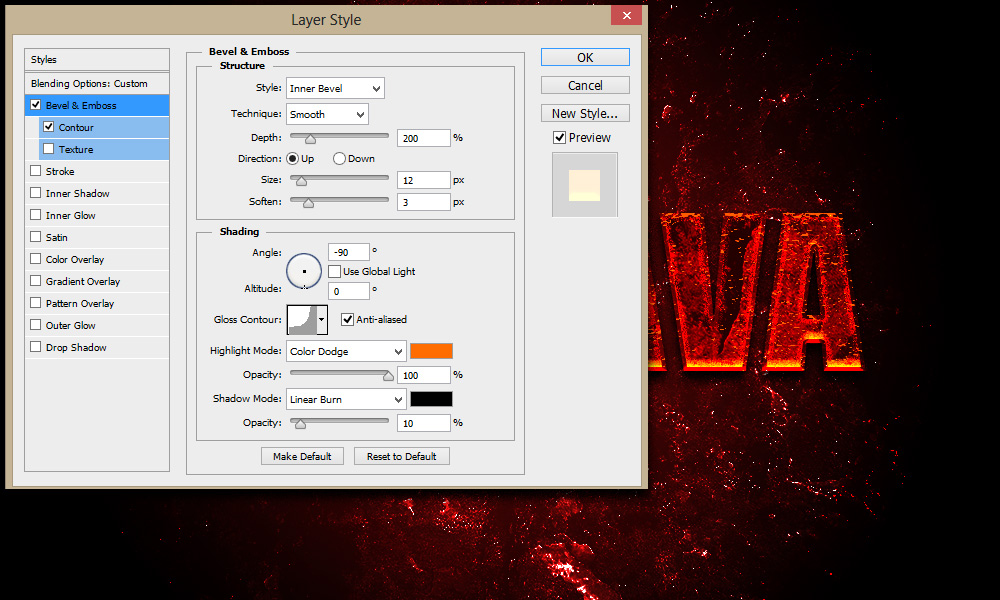
Apply the following layer styles to the duplicate text layer.
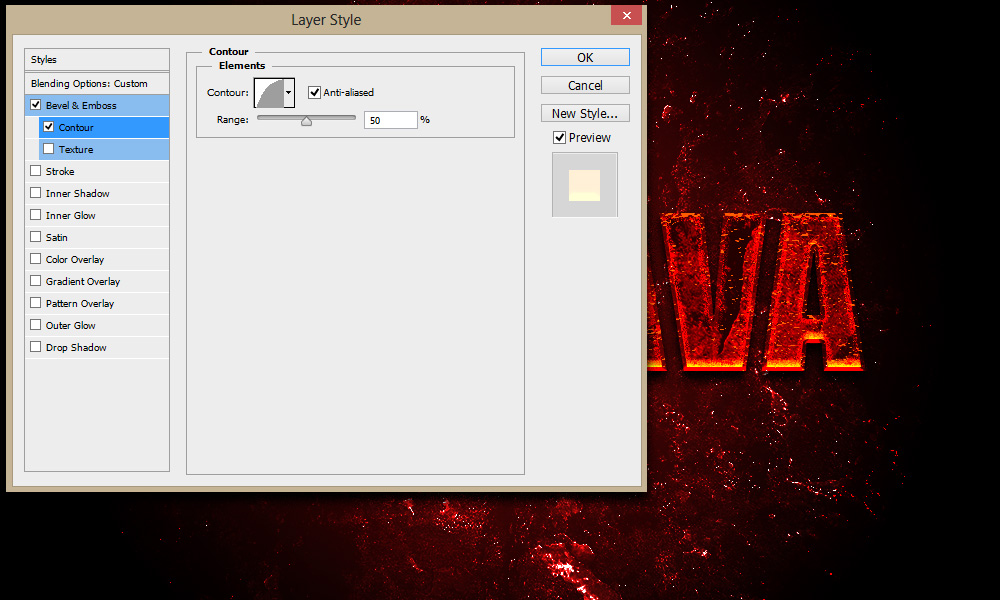
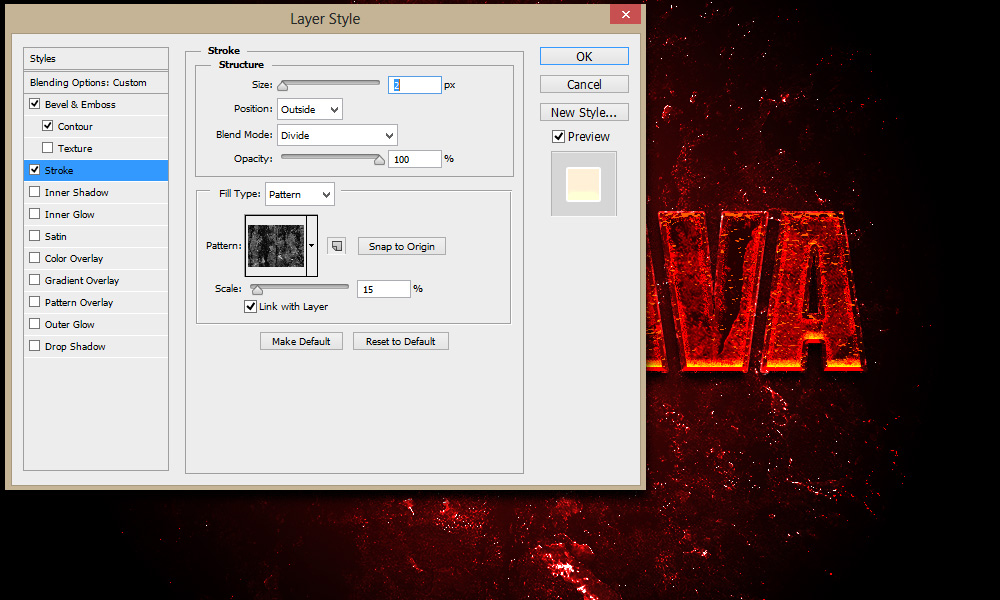
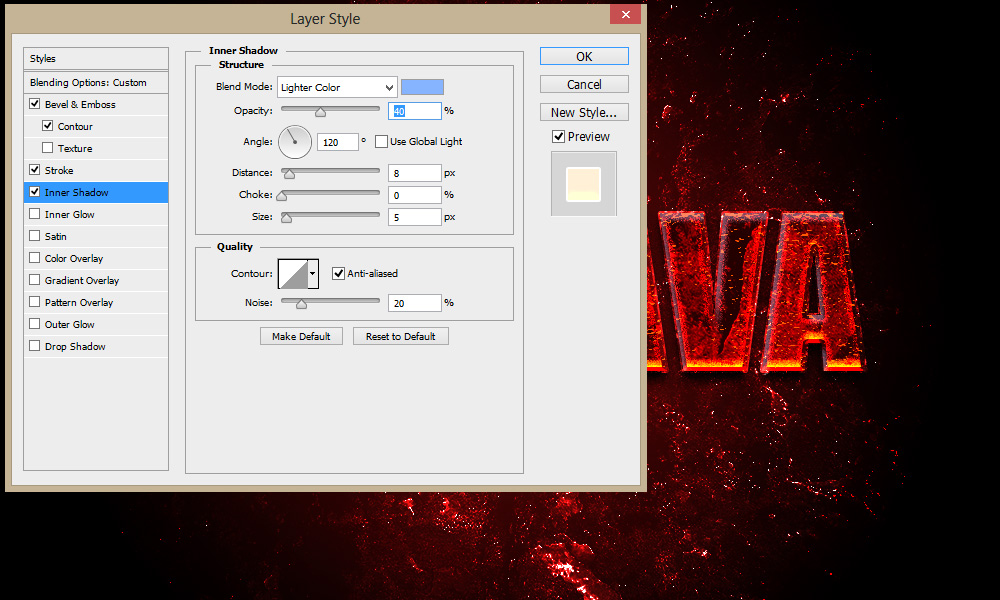
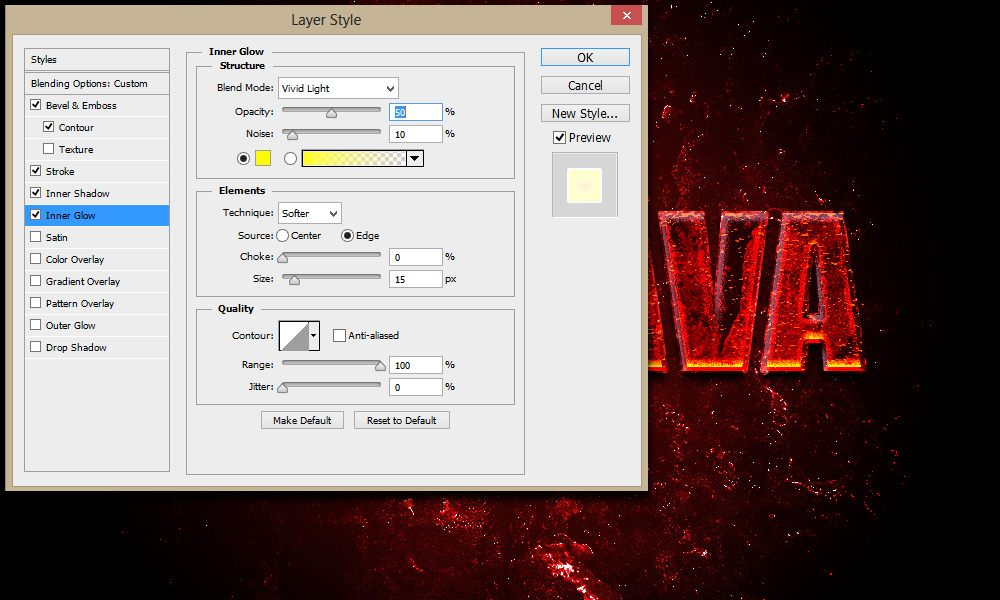
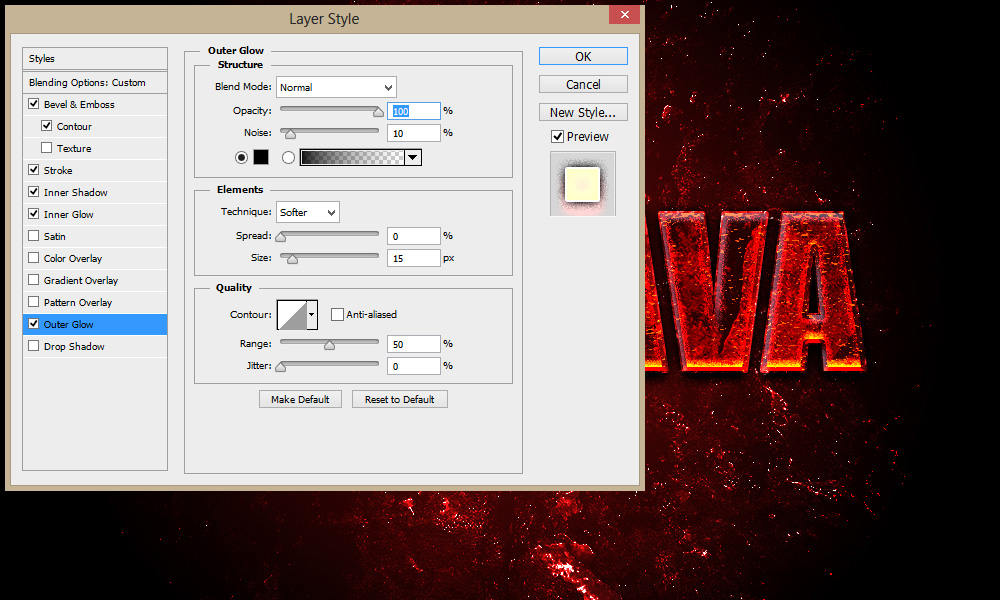
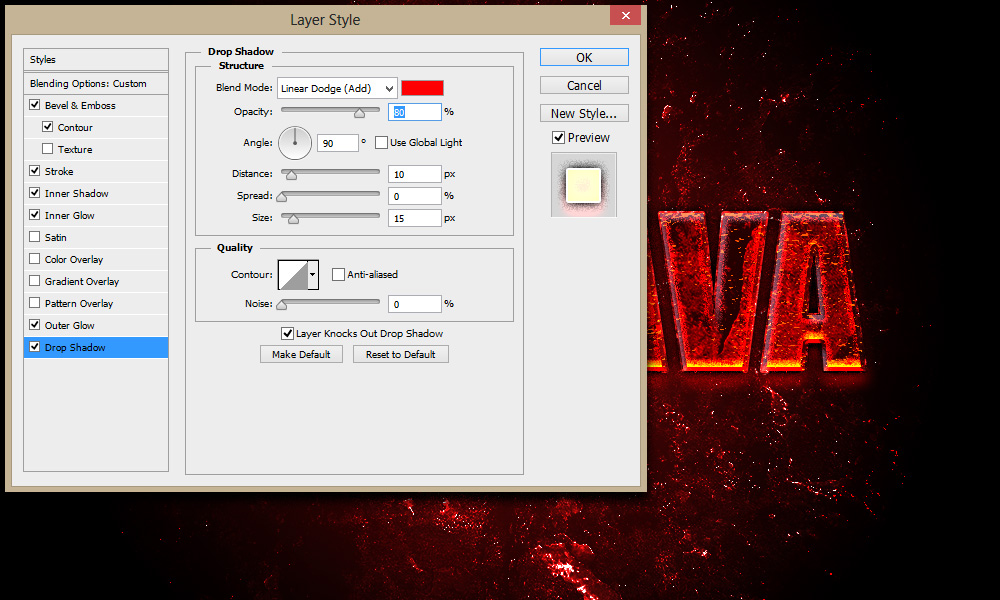
Now your text will look something like this.
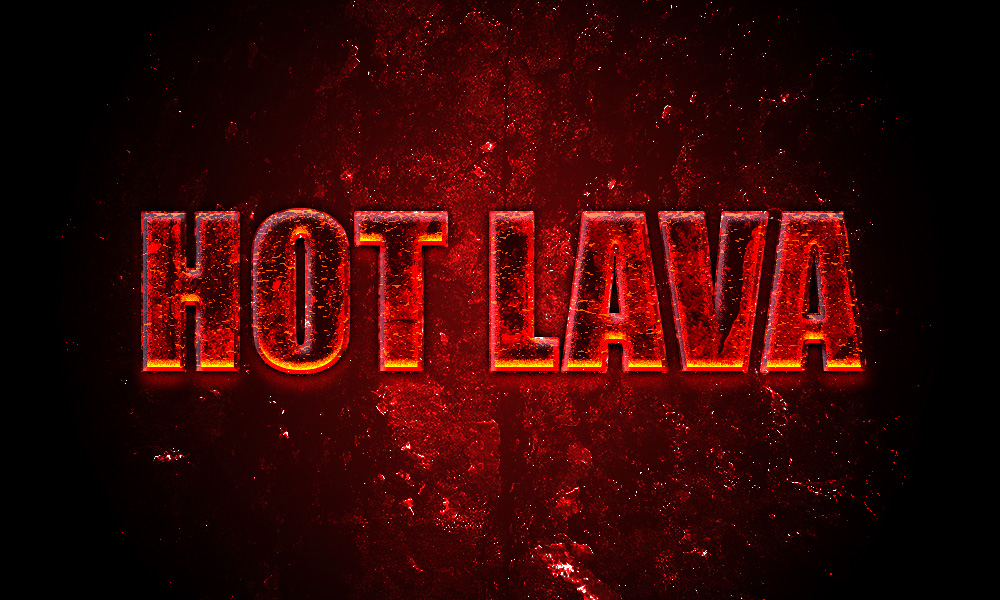
It’s time to add some fire flames to the text so it should look real hot and burning. Let's go ahead and download the flames image from the URL as mentioned in the beginning of the tutorial. Open up the image in a new document and select the black area with Magic Wand Tool. Right click and add Feather Radius to 5 and delete the black area.
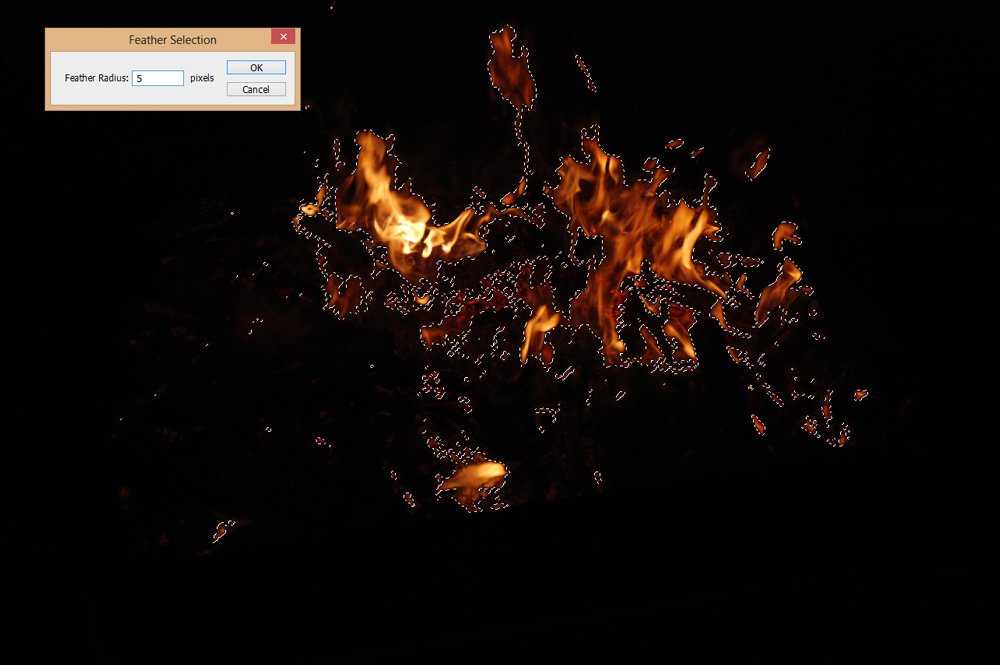
Now copy the flames (Ctrl/Cmd + C) and paste (Ctrl/Cmd + V) the selection on to the HOT LAVA text document. Name the layer as Fire and convert it to Smart Object by right-clicking on the layer and selecting the Convert to Smart Object option. Now scale down the layer by going to Edit > Transform > Scale or (Ctrl/Cmd + T) and move the layer to make it look fit as you feel appropriate. Set the layer Blending Mode to Screen.
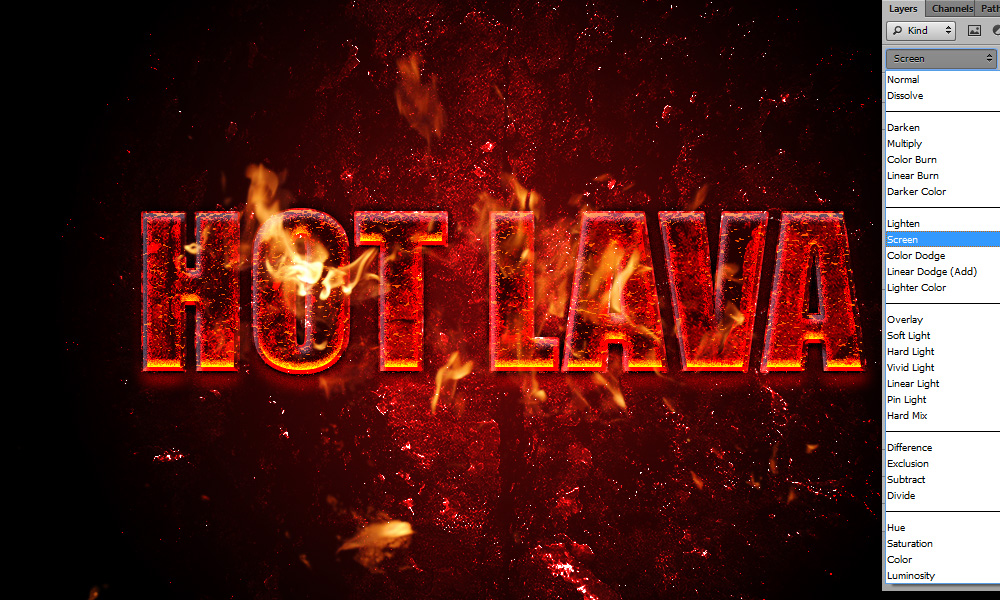
Let’s add some final touches of depth and balance to the flames. Apply Levels from Adjustment Layer fill and set Clipping Mask to the Fire layer, so the Levels effect doesn’t apply to the whole document.
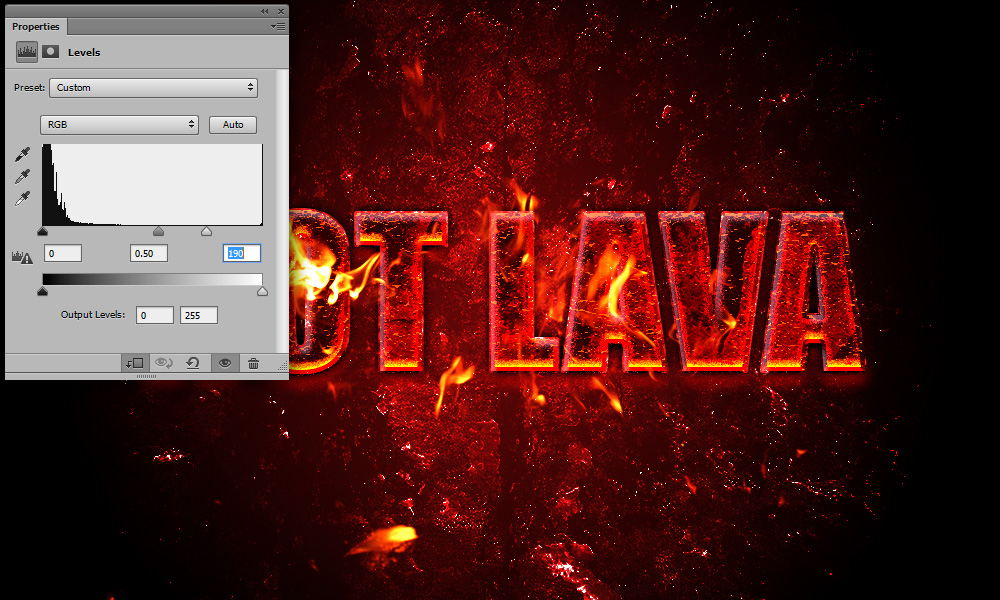
Final result

Feel free to create your own hot lava text effect by following this wonderful tutorial. You can play around and be more creative. If you have any questions, just ask me in the comments box and I will try to answer them promptly.
Download PSD File






1 thought on “How to Create a Hot Lava Text Effect in Photoshop”
So awesome, but i can’t understand how to creat Gradient Fill Layer