Comparing the Video Masking Tools: Wondershare Filmora vs Davinci Resolve
Video masking is a feature available in video editing software. This tool allows users to clip certain information and insert or blur select areas of the video. This eventually directs attention to a specified focus point while obscuring the rest, such as faces or license plate blur.
Masking technology can be used for various artistic objectives. Masking features include cloning, creating glitch effects, hiding faces, etc.
There are several tools available for masking video. However, we will demonstrate the top two options and all-in-one video editing tools.
This article will compare the best video masking tools: Wondershare Filmora and DaVinci Resolve.
Tool 1: Wondershare Filmora
Wondershare Filmora is a feature-rich video editing program. It is an easy-to-use video editor with a similar UI for creating small video projects. The program has a variety of extras like transitions, titles, stickers, templates, and video effects that can be used in your production.
You can also make mask videos with Filmora masking features. It has several masking settings to make masking easier for you. Filmora saves you the hassle of producing masks on your own. Filmora uses powerful AI algorithms to recognize things and create realistic masks. The auto-masking tool provides users with an intelligent brush option for creating masking with just one brush.
Key Features
Here are some key features of video masking in Wondershare Filmora.
- With the AI masking tool, you could use pro features to create stunning transitions. You may produce smooth changes between scenes by automatically eliminating backdrops and improving visual flow.
- The AI masking tool allows for multi-layer overlay editing by separating topics from their backgrounds, resulting in dynamic composition and fascinating visual storytelling.
- Create Advanced Freeze Frames using AI video masking. You may easily create complicated freeze frames with AI masking. Isolate moments in videos to generate appealing stills that accurately and stylishly capture the essence of movement and emotion.
- You can use AI video masking to achieve exact color correction. Enhance particular portions of your scene by isolating them, altering colors, and applying professional-grade visual effects with precision and efficiency.
How to Use Video Mask In Filmora
Below is the complete step-by-step method to mask video with Filmora.
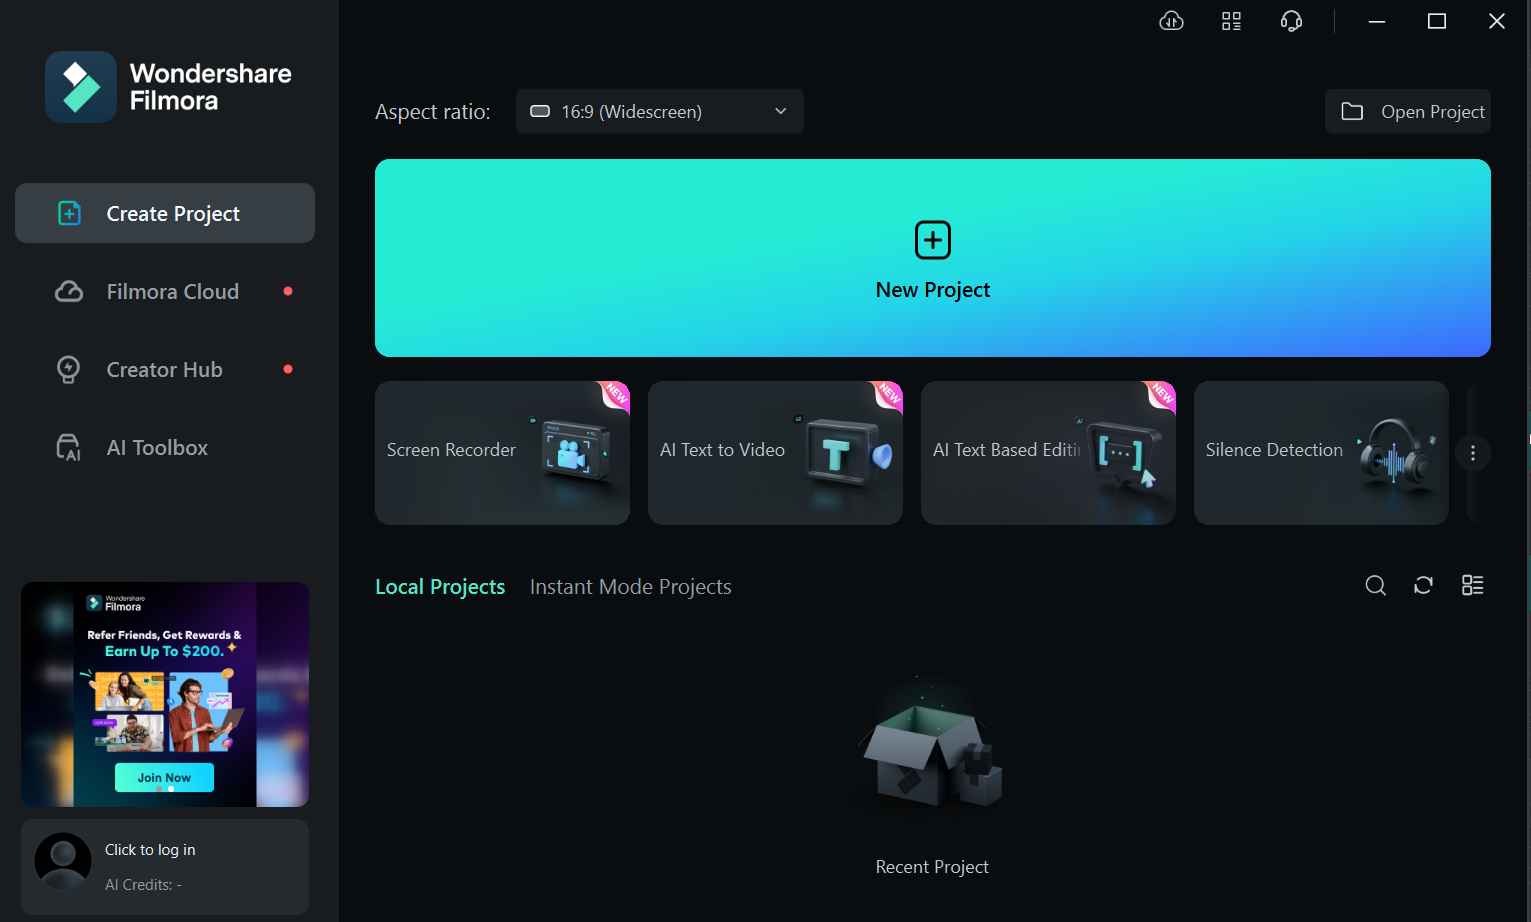
- Step 1: Download and Install Filmora
First, go to the official Wondershare Filmora website and download it. Then, install it and launch the new project from the Filmora dashboard.
- Step 2: Import Video Files
Now, click the Import icon to add the videos to the project.
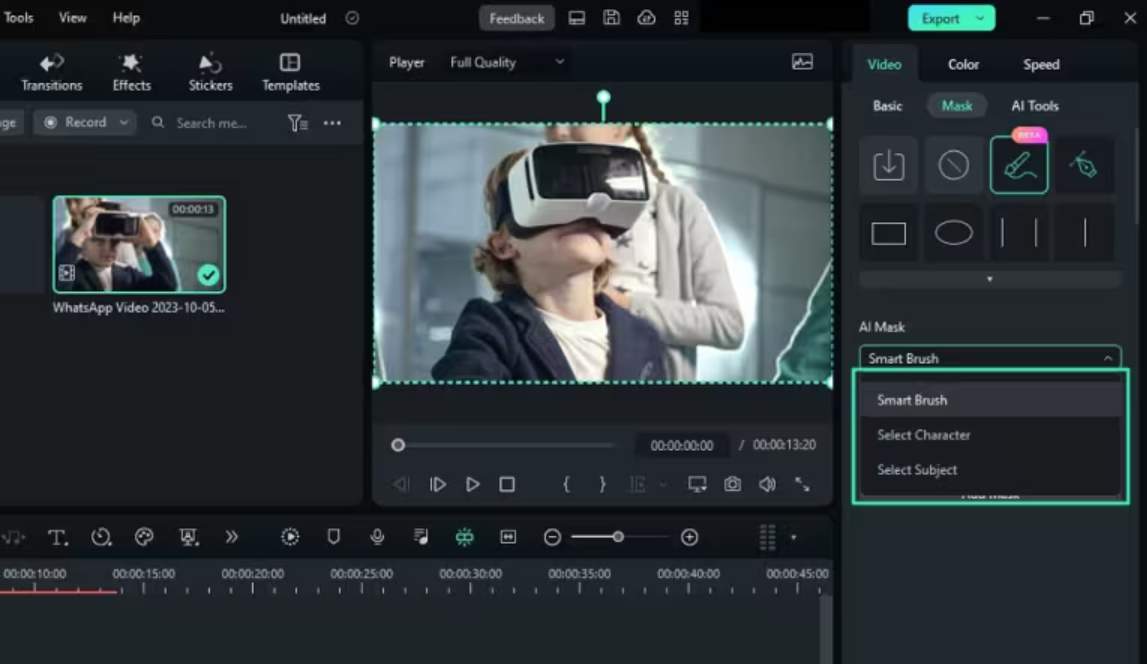
- Step 3: Enable the AI Mask Option
To start masking, choose your clip from the timeline and drag the cursor over the options panel. Click the “Mask” option under the “Video” tab, then the “AI Mask” button.
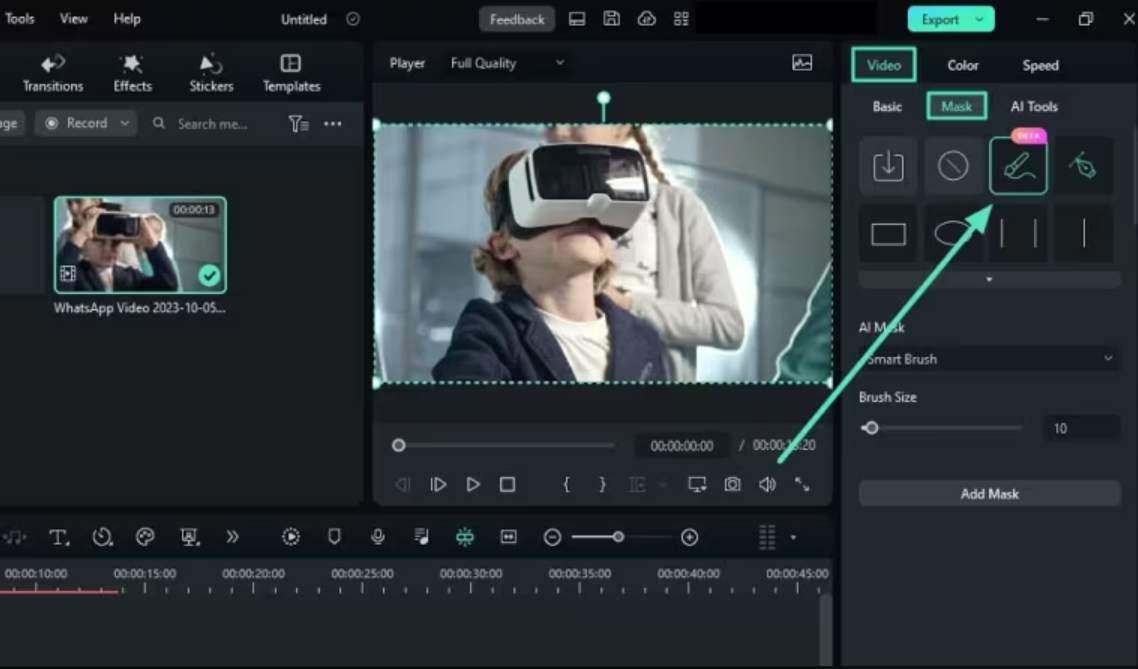
- Step 4. Choose the AI Mask Option
You can also choose “Smart Brush” and “Select Subject.” After choosing more selections from the list, click the “Add Mask” option.
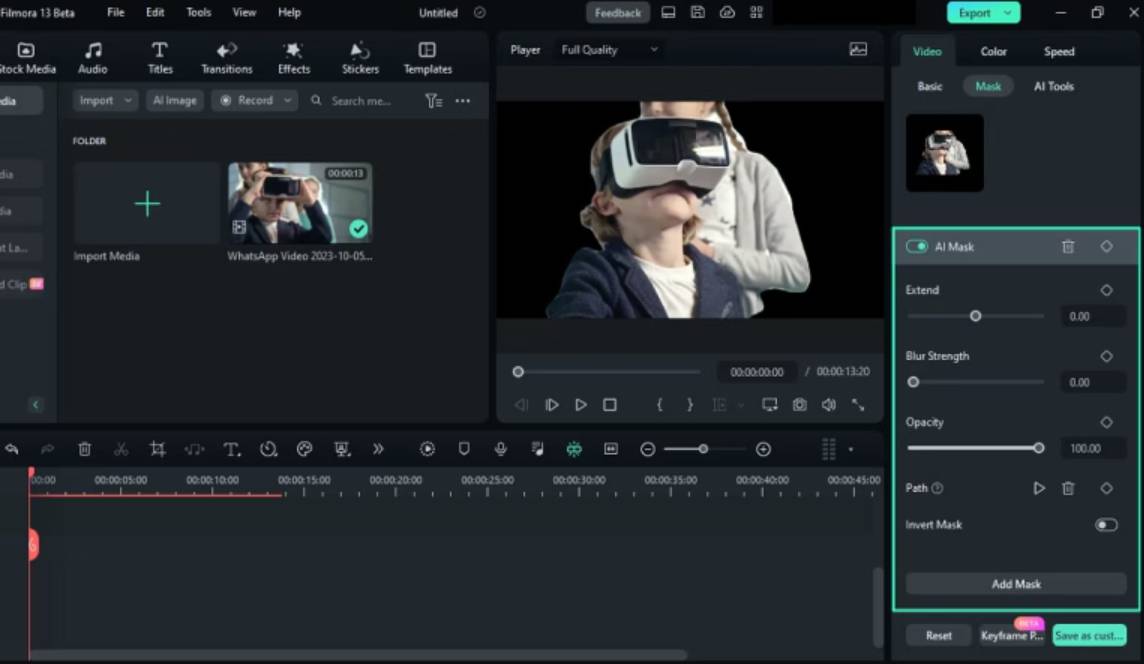
- Step 5: Export the Video
You can adjust other mask settings such as “Expand,” “Blur and “Opacity.” Once finished, select the “Export” option in the top right corner to save the video to your smartphone.
Tool 2: DaVinci Resolve
DaVinci Resolve is a high-end professional video editing application that, while not the easiest to use, offers a full-featured free version that appeals to both novices and professionals. The node-based editing approach allows for complete control over effects, and the program includes keyframing, color grading, and audio capabilities.
DaVinci Resolve runs seamlessly on Windows, Mac, and Linux and has automatic object tracking and powerful masking capabilities. Davinci Resolve’s Mask capability enables users to do various tasks, including changing layer spacing, exposing text from behind objects, producing focus movement, and adding 2D effects. Furthermore, these masking features work perfectly with the software’s editing tools, such as color correction and motion graphics.
Key Features
Here are some key features of video masking in DaVinci Resolve.
- You may utilize the software’s built-in tracker to follow your masked region throughout the footage. It automatically analyzes frame-by-frame changes, relieving you from the time-consuming chore of manually tracking.
- DaVinci Resolve allows you to make subtle changes to the color values of the region you’ve masked and allows you to apply a wide range of effects.
- Once you’ve constructed a mask that you’re comfortable with, you may flip it to choose the surrounding aspects of the film.
How to Use Video Mask In Davinci Resolve
Here, we will show you the step-by-step method to mask video with Davinci Resolve.
- Step 1: Open DaVinci Resolve and start a new project. Next, import the videos to which you want to apply masks.
- Step 2: Choose File > Import > Media from the main menu, then pick your File.
- Step 3: Select the mask type and form.
- Step 4: Click and drag the item you want to mask in the video. Adjust the anchor points to achieve the desired form.
- Step 5: Save the video to your device once everything seems correct.
Which Tool Is Best for Video Masking: Filmora vs DaVinci Resolve
DaVinci Resolve has a robust free version but lacks specific advanced capabilities, whereas Filmora has more price options but limits some functionality in its free edition. Finally, the decision comes down to what you want in video editing software.
Filmora is user-friendly and more straightforward, whereas DaVinci Resolve is complex and designed for expert users with premium plans. However, we shall examine their performance, and compatibility. So you can quickly choose what is ideal for you.
Performance and Compatibility
Here, we will compare the performance and compatibility of both video masking tools.
Wondershare Filmora
Wondershare Filmora is a video editing tool on various platforms, including Windows, Mac, iPhone, iPad, Apple TV, iPod, and Android. Its performance is dependent on your system’s specs and performance. The minimum requirement is that you have at least 8 GB of RAM and have at least an Intel i5 processor for smooth working.
DaVinci Resolve
DaVinci Resolve is a video editing tool that works on various devices, from low-end to high-end. The system requirements differ based on the operating system and version of DaVinci Resolve. The minimum prerequisites for DaVinci Resolve 18 are Windows 10 Creators Update, 16 GB of system memory, and a discrete GPU with at least 2 GB of VRAM.
Conclusion
Video masking improves the video quality by masking unwanted objects. The two AI video masking tools serve distinct purposes and ability levels. For simplicity and beginners, Filmora is the perfect option. It offers user-friendly AI features and a more reasonable pricing range.
However, DaVinci Resolve is a professional-level program with cutting-edge functionality. It’s best suited for pros. So, select the one that best meets your needs regarding video masking and editing objectives.